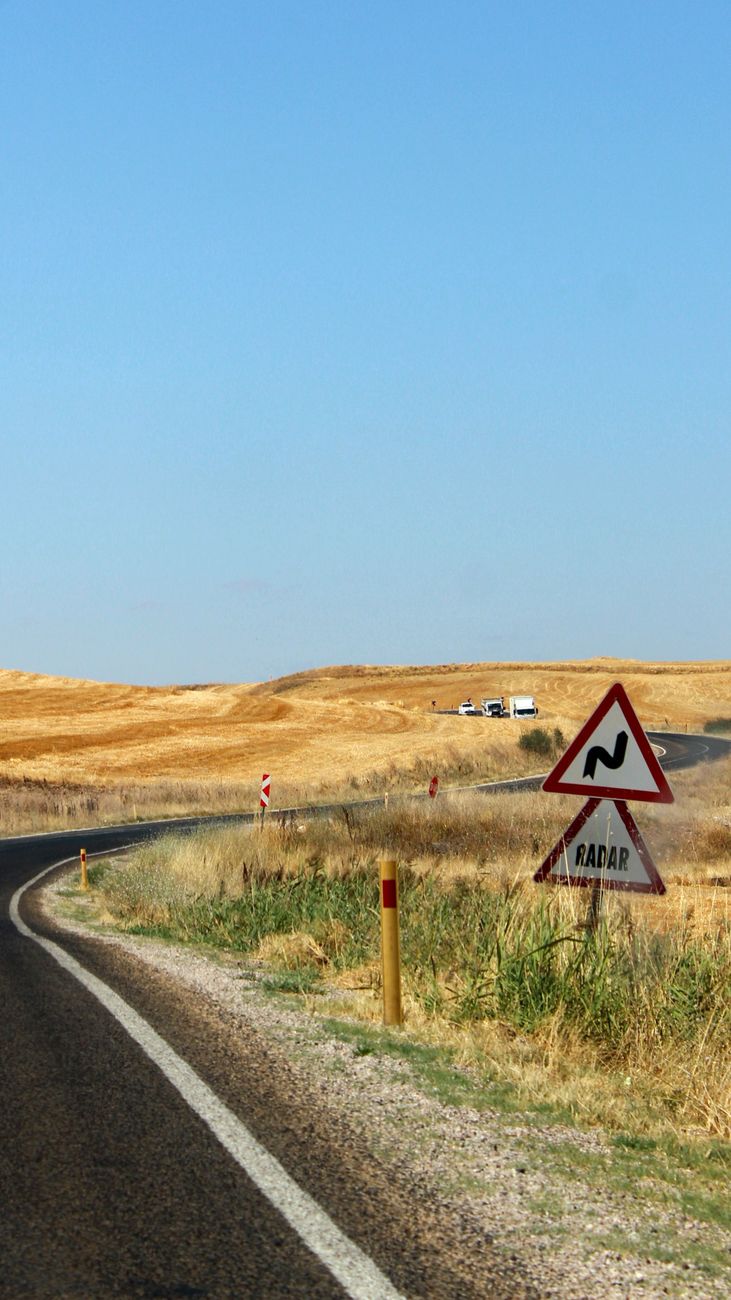
Combination of Traffic Signs: How to Interpret Joint Signs and Pass the Exam
Correctly interpreting traffic signs that appear combined is an essential skill for every driver, and mastering it can make the difference between passing or failing the driving exam. In essence, combining signs involves reading each sign individually and then synthesizing their information to understand the compound instruction presented to the driver.
What is sign combination and why is it important?
Sign combination refers to the simultaneous presence of two or more traffic signs on the same pole or in close proximity, which together convey a more complex instruction than if read separately. This practice is common at intersections, work zones, and stretches with special conditions. Understanding these combinations is crucial because an isolated interpretation can lead to incorrect and dangerous decisions. For example, a speed limit sign next to a dangerous curve sign indicates that the maximum speed applies specifically to that curve, requiring additional reduction if conditions warrant.
How are joint signs interpreted?
Interpreting joint signs is not simply reading each sign and adding their meanings. It is a process of relational analysis. The sign that appears first (usually the top one) establishes the main context, while the following ones qualify or expand that information. This approach is similar to interpreting symbols in other fields, where order and position modify the overall meaning. In the road context, the priority sign, the danger sign, and the prohibition sign, when they appear together, generate an instruction that must be read as a unit.
Signs that are frequently combined
Although there is no exhaustive catalog, there are typical combinations that appear on the driving exam and on public roads. Some of them are:
- Dangerous curve sign + maximum speed sign: indicates that the speed is limited for that specific curve.
- School zone sign + maximum speed sign: the maximum speed applies only during school hours or in the presence of children.
- Pedestrian crossing sign + yield sign: warns of pedestrians and requires yielding to them.
- Roadwork sign + detour sign: indicates a specific detour due to road work.
- Steep grade sign + no passing sign: on a grade, passing is prohibited due to reduced visibility.
These combinations are detailed in driving manuals and exams, where the driver is expected to identify the joint instruction.
The framework for interpreting joint signs
To systematically approach combined signs, we present a three-step framework, based on principles of reading combined symbols that also apply to other sign systems.
Step 1: Identify each sign separately
The first step is to recognize each sign individually. You cannot interpret a combination if you do not master the meaning of each one. Ask yourself: What does each sign indicate on its own? Note its shape, color, and symbol. For example, a red octagonal sign is always STOP, a triangular sign with a red border is YIELD, and a circular sign with a red border is a PROHIBITION.
Step 2: Analyze the relationship between signs
Once identified, analyze how they relate to each other. The top sign generally establishes the main condition, while the lower ones modify or specify it. Consider whether the meanings reinforce each other (harmony) or introduce an apparent contradiction (contrast). For example, a "landslide zone" sign next to a "maximum speed 40 km/h" sign is not contradictory; the second complements the first, indicating the safe speed in that zone.
Step 3: Apply the road context
Context is key. The combination must be interpreted according to the real situation of the road: type of road, weather conditions, presence of pedestrians, etc. For example, if you encounter a "slippery pavement" sign next to a "dangerous curve" sign on a rainy day, you must reduce speed even more, even if there is no specific speed limit sign. The road context tells you that the combination becomes more restrictive under certain circumstances.
How to apply this framework in the driving exam?
In the driving exam, questions about sign combinations usually present an image or description of two or more signs and ask what the correct action is. To answer correctly, follow these steps:
- Identify each sign: recognize the type and basic meaning of each one.
- Determine the relationship: observe if one modifies the other or if they complement each other.
- Consider the context: think about the typical situation of that combination (e.g., school zone, roadwork, curve).
- Choose the answer that reflects the joint instruction: discard options that are based on only one of the signs.
This methodology not only helps you on the exam but also improves your daily driving.
Practical examples of sign combinations
Let's look at some real examples to illustrate the framework.
Example 1: School zone sign and maximum speed sign
Imagine you see a school zone sign (a yellow rectangle with two walking silhouettes) and below it a circular speed limit sign of 30 km/h. Separately, the first indicates that you are entering a school zone, and the second, that the maximum speed is 30. Together, they indicate that you must drive at 30 km/h or less while in the school zone. The context (school hours, children present) may require you to go even slower.
Example 2: Railroad crossing sign and stop sign
Another common combination is the railroad crossing sign (an X with a sign saying "Railroad Crossing") accompanied by a STOP sign. In this case, the joint instruction is that you must come to a complete stop before the crossing, even if you do not see a train. The stop sign reinforces the need to stop, not just yield. Ignoring this combination can be fatal.
Example 3: Steep grade sign and no passing sign
If you see a steep grade sign (a triangle with a vehicle descending) and a no passing sign (a circle with two cars), the combination indicates that, due to the grade and possible lack of visibility, passing is prohibited. This rule applies throughout the grade, even if you do not see the no passing sign repeated.
Common mistakes when interpreting joint signs
Many drivers make mistakes when reading sign combinations. The most frequent are:
- Interpreting signs as independent: treating each sign as an isolated instruction, leading to ignoring the relationship between them. This is the main error: not seeing the "story" they tell together.
- Not considering the order: the top sign is usually the main one, and the lower ones qualify it. Ignoring the order can change the meaning.
- Not taking the context into account: a combination of signs in a work zone may have a different meaning than on a normal road, because the work zone context modifies conditions.
- Confusing similar signs: for example, confusing a "school zone" sign with a "playground zone" sign, or a "steep grade" with a "speed bump". It is essential to know each sign well.
- Forgetting that the priority sign prevails: at an intersection with a yield sign and a mandatory direction sign, priority is established by the yield sign; the other only indicates the direction.
To avoid these mistakes, practice with images of combined signs and ask yourself what you would do in each case.
Tools and resources for practice
Practice is essential to master interpreting joint signs. Here are some tools you can use:
- Official driving manuals: contain sections dedicated to traffic signs and their combinations.
- Mobile practice apps for the exam: many include questions on sign combinations.
- Flashcards: create cards with sign combinations on one side and their meaning on the other.
- Online simulators: some websites offer practice exams that include images of combined signs.
Additionally, you can use a practice method similar to tarot reading: after seeing a combination, write down the meaning of each sign separately and then write a sentence that integrates them. This technique reinforces your synthesis ability.
The importance of signs in work zones and special conditions
Sign combinations are particularly common in work zones and stretches with special conditions, such as curves, grades, and areas with poor visibility. In these places, signs are grouped to warn of specific hazards and regulate speed. For example, in a work zone you may find a "men working" sign next to a "maximum speed 30 km/h" sign and a "detour left" sign. The joint interpretation tells you to reduce speed to 30 km/h and prepare to detour to the left, all while workers are present.
Similarly, on a mountain road, signs for dangerous curves, steep grades, and no passing often appear combined. The [sign for special road conditions](such as grades, curves, and areas with poor visibility) requires driving adapted to the topography. If you need to review these concepts, see our article on Special Road Condition Signs: Grades, Curves, and Low Visibility Zones in the Exam.
Likewise, in roadworks, correctly interpreting joint signs is vital for the safety of workers and drivers. If you face a work environment, be sure to read all signs present carefully. To delve deeper, we recommend our article on Traffic Signs in Work Zones: How to Interpret and Act.
Frequently asked questions about sign combinations
What do I do if signs seem contradictory?
Traffic signs are never contradictory in themselves, but they may seem so if not interpreted in context. For example, a maximum speed sign next to a school zone sign is not contradictory: the maximum speed applies to the school zone. If you see a sign that seems to contradict another (e.g., a 50 km/h limit and an 80 km/h limit), it is likely that the top sign has priority or that they are on separate poles at some distance. In doubt, the more restrictive sign usually prevails.
Do joint signs have priority over individual ones?
Not hierarchically; all have the same authority, but joint interpretation requires understanding how they combine. The combination creates an instruction that is not in any of the signs separately. For example, a "landslide zone" sign and a "no parking" sign are not directly related; the first is a warning and the second a prohibition. In contrast, a "landslide zone" sign with a "maximum speed 30 km/h" sign does form a combined instruction.
How do I know when a combination is a warning and when a prohibition?
Generally, circular signs are prohibitions, triangular signs are warnings, and rectangular signs are information or indication. If you see a triangular sign next to a circular one, the triangular warns you of a danger and the circular imposes an obligation or prohibition. For example, a "dangerous curve" triangle next to a "no passing" circle warns of danger and prohibits passing.
Conclusion
Interpreting joint signs is a skill that is learned and perfected with practice. By mastering the three-step framework (identify each sign, analyze their relationship, and consider the context), you will be better prepared for the driving exam and, more importantly, for driving safely in real situations. Remember that each sign has an individual meaning, but it is their combination that tells you exactly what to do. Practice with examples, avoid common mistakes, and consult reliable sources to expand your knowledge. The road is a dynamic environment where signs work together to guide you; learning to read them together is a sign of responsible and expert driving.
If this framework has been helpful, share it with other drivers preparing for their exam. And don't forget to complement your study with articles on signs in work zones and special road conditions, where combinations are especially frequent. [internal link] Constant practice and driver education are the key to safe driving for everyone.